Quick Relief for Your Itchy Pup
Act fast to soothe your dog’s flea itch with six simple, vet-inspired steps. You’ll confirm fleas, get immediate relief, treat infestations, clean your home, calm irritated skin, and prevent future outbreaks — a friendly plan to help your pup right now.
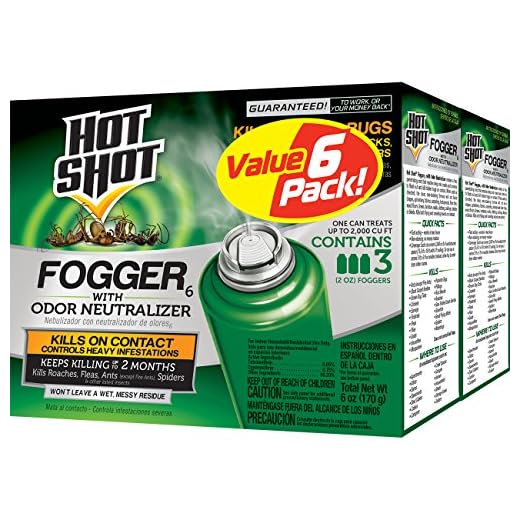
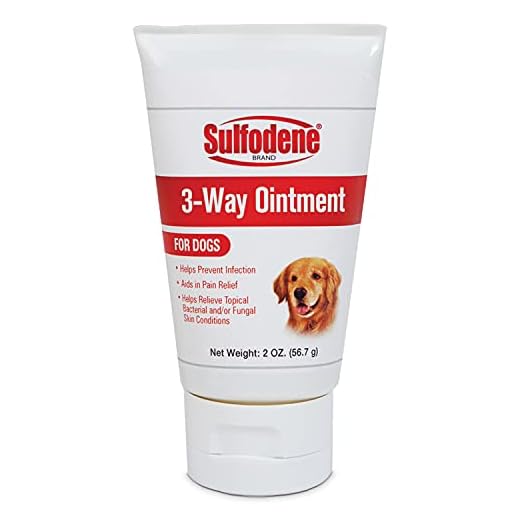
What You'll Need
Step 1: Confirm Fleas and Assess the Itch
Not just bites — could it be fleas? Quick checks that save hours of guessing.Confirm fleas rather than other causes. Check the base of the tail, groin, neck and belly for tiny dark specks, moving black dots, or flea dirt (fine black granules that turn red when wet).
Run a fine-toothed flea comb through the coat onto a white paper towel — you’ll catch adults and dirt. If you see black specks that smear reddish when damp, that’s flea dirt. For example: comb a 2–3 inch patch, tap the comb onto the towel, then dab with water.
Watch your dog’s behavior and body for signs:
If you see swelling, pus, widespread hair loss, or your dog is very young, old, or having breathing issues, pause and contact your vet before treating. Taking photos of the area helps track progress and aids vets during consultations today.
Step 2: Bathe and Soothe — Immediate Relief
A quick bath can be magic — here's how to calm itching without making it worse.Give a gentle bath with a mild, fragrance-free dog shampoo or a vet-recommended medicated anti-itch formula. Use lukewarm water, massage shampoo in, and let it sit briefly to loosen fleas and calm skin.
Rinse thoroughly to remove residue and flea dirt. Pat your dog dry with towels; avoid hot blow-drying. Consider an oatmeal or aloe rinse (vet-approved) for extra soothing.
After drying, comb the coat to remove remaining fleas and debris and inspect the skin for redness or bite clusters. Bathing helps immediate comfort but won’t clear a heavy infestation alone — plan follow-up flea treatment and home cleaning, and consult your vet if your dog looks unwell or the itch persists. Keep your dog calm and cool after the bath, provide water, rest, and gentle reassurance quietly as treatments work.
Step 3: Use Appropriate Flea Treatment
Don’t guess — choose fast, vet-approved options that actually work (and avoid myths).Choose a safe, effective flea-control product based on your dog’s age, weight, health, and any medications they’re taking. Pick something fast-acting for relief and suitable for long-term control.
Always follow label dosing and schedules; overdosing can be dangerous. Avoid human products — many are toxic to dogs. If your dog has open wounds or severe irritation, check with your vet before applying chemicals. For immediate itch reduction, vets may prescribe short antihistamine or steroid courses or topical anti-inflammatory gels. If unsure, bring photos and any flea samples to your vet or pet pharmacist and record treatment dates; set reminders for follow-ups.
Step 4: Clean the Home to Stop Reinfestation
Think like a flea: hotspots, lifecycle, and what to blast to break the cycle.Clean your home thoroughly to break the flea life cycle. Start by removing and laundering everything your dog uses — toys, beds, blankets — so fleas and eggs can’t hide.
Repeat cleaning and treatments according to product timelines to prevent new hatches from reinfesting your dog.
Step 5: Calm the Skin and Treat Secondary Problems
Itch is one thing — infections and allergies are another. Here’s how to prevent complications.Calm irritated skin gently after fleas are under control. Clean hot spots with a mild antiseptic rinse or as your vet directs. Clip surrounding hair carefully to help air flow and let topical meds reach the skin (e.g., trim ~1–2 cm around the sore).
Avoid home remedies with alcohol, hydrogen peroxide, or essential oils unless your vet says so—these can worsen inflammation or be toxic. Schedule follow-ups so treatments can be adjusted, and consider flea allergy testing or long-term preventives if needed.
Step 6: Prevent Future Outbreaks and Monitor Progress
One treatment isn't enough—learn the small habits that stop fleas permanently.Keep your dog on a veterinarian-recommended monthly flea preventive (topical or oral) year-round or seasonally—ask your vet which product fits your dog and lifestyle.
Inspect your dog with a flea comb after park visits or contact with other animals, and wash bedding weekly. Maintain your yard: trim grass, remove leaf litter, fix shady damp spots, and consider perimeter treatments if risk is high.
Track progress with photos and notes: record treatment dates, products used, and symptom changes so you can show accurate info to your vet. Treat all pets at once and educate household members to avoid cross-infestation.
Small Steps, Big Relief
Act now with consistent treatment, cleaning, and gentle care to stop your dog’s itch cycle; monitor progress and contact your vet if symptoms worsen or infection appears—be proactive and vigilant. What simple step will you take now to ease them?


Good article but I’m still unsure about Step 1 — how do I tell if it’s fleas or flea allergy dermatitis? The pics online are confusing and my dog has red bumps but I haven’t seen fleas.
Any signs I should look for before jumping to chemical treatments?
If the dog is biting only one spot obsessively, it’s often an allergy. But fleas can be sneaky. I took a photo and the vet zoomed in and found flea dirt — solved the mystery.
Great question, Carlos. Flea allergy dermatitis (FAD) often shows as intense itching, especially at the base of the tail, groin, and belly — even if you don’t spot fleas. A thorough combing with a fine-toothed flea comb (especially after bathing) and checking for ‘flea dirt’ (tiny black specks that turn reddish-brown on wet paper) can help confirm fleas. If you’re still unsure, a quick vet check is worth it before starting stronger treatments.
Short and sweet — great guide. Quick Q: are these treatments safe for puppies under 6 months or for dogs that are pregnant? 🤔
Good question, Raj. Some flea products are not safe for young puppies or pregnant/nursing dogs. Always check the product label and talk to your vet — they’ll recommend age- and weight-appropriate options or safer alternatives.
Yep, my breeder told me to only use vet-approved products for my new pup. Better to be cautious.
This was actually kinda funny — my dog acted like the spa treatment in Step 2 was a betrayal 😂
We did the oatmeal bath and she gave me the look of doom for 10 minutes, then fell asleep.
Real talk: some topical treatments gave her a weird rash once, so be careful and read the label.
Cleaning the house (Step 4) is the worst part — my vacuuming arm still hates me.
Overall: 10/10 would soothe again.
Ha! My pup gives me that betrayal look too. For the rash from topicals, did you try switching brands or doing a spot test first?
Thanks Megan — I switched to an oral after the rash and it was much better. Vet recommended it based on her size and skin sensitivity.
Thanks for the heads-up, Hannah. Some dogs can be sensitive to certain active ingredients in flea products. If you notice a rash or unusual behavior after applying a product, stop use and consult your vet right away — sometimes an alternative or oral medication is safer.
Vacuuming + couch steam cleaning saved me. Also consider washing slipcovers, and yes, your vacuum arm will eventually forgive you.
Useful but felt a little light on the pros/cons of oral vs topical treatments in Step 3.
I know cost and convenience matter — but some topicals can wash off, others last a month. Orals are great but some pets get sick from them.
Would love a short comparison chart next time. Also, maybe mention the environmental sprays and whether they’re safe around kids — that’s a big concern for me.
Thanks for the suggestion, Zoe. A comparison chart is a great idea — oral treatments generally act systemically and are less affected by bathing, while topicals can be more prone to washing off but offer local action. Safety profiles differ by active ingredient; always read labels and consult a vet, especially regarding children in the household when using environmental sprays.
Totally agree. I went with oral because our retriever swims weekly. Saved me the worry of reapplying topicals after baths.
Thanks — that helps. If you do a follow-up update, chart pls 😅 and a note on household safety would be gold.
This guide was super helpful — I did the bath + soothing step last week and Milo stopped scratching like 80% faster.
I used a gentle oatmeal shampoo (Step 2) and then followed up with the vet-approved topical from Step 3.
Big tip: comb out the fleas with a flea comb while the coat is still wet, it actually catches a lot.
Also — don’t forget to wash all bedding on hot and vacuum the couch (Step 4). Took me three days to feel like the house was clear.
Thanks for the clear steps, saved me a vet visit panic moment! 😊
Yesss this! I did the combing + vacuum routine and found SO many fleas. Took forever but worth it. Pro tip: seal washed toys in a plastic bag for 48 hrs to be safe.
Great to hear Milo is feeling better, Emily — love the oatmeal shampoo tip. Oatmeal is gentle and can help calm inflamed skin. The combing while wet is a smart move because the water slows fleas down.
Nice — glad Milo’s doing better. Did you need to re-treat the house with anything besides vacuuming and washing? I’m worried about eggs hidden in carpets.
Helpful steps, especially Step 6 about monitoring.
I like the idea of taking weekly progress photos and checking for new flea dirt. It’s low effort and gives peace of mind.
One question: how long should you expect to see real improvement after starting treatment?
I’ve seen a big drop in scratching in 2 days, but the house took me a month of consistent cleaning to feel 100%.
Good approach, Marcus. You can often see scratching reduce within 24–72 hours after an effective treatment, but full resolution (and killing eggs/larvae in the environment) can take several weeks. Continue environmental cleaning and follow the treatment schedule your vet or the product recommends, and keep monitoring weekly until clean.
I want to add a few little things that worked for us — hope it’s helpful:
1) After the bath (Step 2) I used a cooling aloe spray recommended by our vet to soothe inflamed areas.
2) For Step 4, bagging and freezing small toys for 48 hours killed the eggs without chemicals.
3) We also used a brief hydrocortisone cream on tiny hot spots (with vet approval) to stop the self-trauma.
Small steps = big relief. This guide hit all the major points in an easy order.
Excellent additions, Olivia. Freezing toys is a clever, chemical-free trick. And yes — vet approval before topical steroids is important to avoid masking infections.
Yep, vet check first is key. I was nervous about steroids but the vet supervised and it healed the hotspots fast.
Hydrocortisone helped my pup too, but only after the vet confirmed no secondary bacterial infection. Otherwise it can make things worse.
Thanks for the detailed list — very practical. Readers: freezing and hot-spot management are great complements to the main steps in the guide.
I liked the freezing trick a lot. Also hot tip: put a small amount of dish soap in a bowl by your combing station — it kills fleas you flick off immediately.