Beat Finch Mites — a friendly roadmap
Have you noticed your finch scratching, fluffed up, or losing feathers? Finch mites are tiny parasites that can make birds uncomfortable and lead to skin and feather damage if not treated.
This guide walks you through safe, simple home measures you can consider, and—crucially—how to DISCUSS them with your veterinarian before trying anything. It focuses on signs to watch for, gentle preparations you can do at home, commonly asked home remedies that are vet-friendly, and the right questions and information to bring to your appointment.
Professional guidance is key. These steps are meant to help you act quickly and wisely so your finch gets the best care. You’re not alone in this today.


Get to know finch mites: signs, lifecycle, and risks
Tell-tale signs (what to watch for)
Mites are tiny, but their effects aren’t. Common clues include:
A real-world example: an owner noticed their zebra finch was waking at night and batting at its face—what looked like “dandruff” turned out to be mite debris. A quick photo helped the vet confirm the problem.
How mites reproduce and spread (quick lifecycle)
Most finch mites follow a simple cycle: egg → larva → nymph → adult. Depending on species and temperature, that can take as little as 1–3 weeks, so populations can explode fast in warm, crowded conditions. Mites live on feathers and skin, lay eggs in feather bases or crevices, and feed on skin debris or blood (species-dependent).
Spread happens by:
Who’s most at risk — and why early detection matters
Young birds, elderly or sick birds, and newly hatched chicks are the most vulnerable. Heavy infestations can cause anemia, open wounds from over-preening, secondary bacterial infections, reduced egg production, and—even though it’s rare—death in severely weakened birds. In aviaries, one infected bird can seed a problem across multiple cages fast.
Mild irritation vs. urgent veterinary care
Mild: occasional scratching, a few missing feathers, alert bird still eating and active. Try close observation, photos, and basic hygiene measures while arranging a vet consult.
Urgent: heavy feather loss, open sores, pale or weak bird, severe lethargy, breathing problems, or multiple birds showing the same severe signs — seek immediate veterinary attention.
Quick steps to collect useful info before the visit
Armed with these observations, you’ll give your vet a head start on diagnosis and safe treatment options.
Prep first: safe steps at home before trying anything
A few calm, sensible actions at home can slow the spread of mites and give your vet the best chance to help. Think of this as triage — gentle, non-chemical steps you can do right now while you make an appointment.
Isolate and protect
Move the affected finch to a separate, quiet cage if possible. Keep that cage away from other birds, shared perches, and play areas for at least a few days.
Clean smart — what to do now
Aim for thorough, mechanical cleaning; avoid pesticides or sprays unless your vet prescribes them.
Helpful product note: stiff-bristle brushes with narrow heads make it easier to reach crevices; avoid harsh chemical cleaners that leave residues.
Manage the environment
Small changes to the room can slow mite reproduction without stressing your bird.
Document carefully for your vet
Good photos and notes speed diagnosis.
What not to do
Don’t spray household pesticides, apply essential oils, or dose medications like ivermectin without vet instruction — these can irritate skin, cause toxicity, mask signs, and complicate diagnosis and treatment. If you’ve already tried something, note it for your vet.
These sensible steps buy time and clarity — next, you’ll want to bring your findings to the vet so they can recommend targeted, safe treatment.
Vet-friendly home remedies people often ask about
Below are the common home approaches bird owners consider — framed as conversation starters for your vet, not DIY prescriptions. If your vet okays any of these, ask for exact instructions and follow-up timing.
Environmental approaches (deep-cleaning, steam/heat)
Many owners tackle the environment first: deep-clean cages, steam toys, launder liners, use heat to kill mites in crevices.
Quick how-to tip: remove the bird, disassemble cage, scrub with warm soapy water, rinse, and let everything dry in sun or on heat. Note any deeply chewed wood may need replacing.
Supportive care (nutrition, stress reduction, baths)
Supportive care helps recovery while you wait for definitive treatment.
Practical steps: Offer fresh, varied food (pellets, greens, seed sparingly), quiet housing, extra perches at different heights, and supervised short warm showers if allowed by your vet.
Topical, “natural” options sometimes used under vet guidance
Owners often ask about neem oil, food-grade diatomaceous earth (DE), diluted herbal sprays, or coconut oil for feather hygiene.
If your vet approves a topical, get step-by-step application advice (dilution, location to apply, frequency) and a clear follow-up plan to check for irritation or ongoing infestation.
Next up: how to bring this info to your vet — what photos, samples, and questions will make the appointment most productive.
How to talk to your vet: what to bring and what to ask
Before the visit: quick checklist
Bring concrete, concise evidence so your vet can triage fast.
Quick phone tips: use natural light, shoot close-ups and one wide shot to show overall plumage. A short video of the bird preening or scratching often tells more than photos.
Sample script and key questions
Use these phrases to keep the conversation focused and collaborative.
Ask for exact dosing, application method, frequency, and what to do if the bird vomits or shows irritation.
Documenting the vet’s instructions
Treat the visit like a legal prescription for your bird.
When to seek immediate care
Head to the clinic now if your finch has any of these: labored breathing, sudden severe lethargy, inability to perch or eat, rapid weight loss (visible keel), uncontrolled bleeding, seizures, or collapse.
Next section will cover safe next steps and prevention plans your vet may recommend.
When home fixes aren’t enough — safe next steps and prevention plans
Red flags — go to the clinic now
Some signs go beyond home care. Bring your finch in immediately if you see any of these:
A real-world note: one reader waited two weeks after spotting bloody feather bases — by the time the vet saw the bird it required hospitalization. Fast action saves feathers and lives.
What the vet can do (and how it differs from home fixes)
Veterinarians will move from diagnosis to targeted treatment quickly:
These options are precise and dose-checked — far safer than over-the-counter guesses. Vets will tell you which, if any, home measures can continue (gentle cleaning, temporary isolation) and which to stop (unmonitored ivermectin or concentrated essential oils).

Prevention checklist — reduce the chance of another outbreak
Do these simple, repeatable steps to cut risk:
Follow-up and long-term partnership
Agree on a timeline with your vet: rechecks at 7–14 days and again at 4 weeks are common. Bring a log of any home remedies used so the vet can assess interactions. Work together to create a bird-safe, long-term prevention plan tailored to your setup and species.
Next, we’ll wrap up with how to keep this partnership strong and protect your flock going forward.
Wrap-up: partner with your vet for safe, effective care
You can take sensible, gentle steps at home to make your finch more comfortable and reduce mite spread, but a vet’s guidance is the safest way to choose treatments and dosages for these delicate birds. Use the prep checklist and the list of common home remedies from this article to have a focused conversation, and bring photos, recent behavior notes, and any products you’re considering.
If you suspect mites, contact your veterinarian promptly rather than waiting—early treatment protects your bird and the flock. At the appointment, use the suggested questions to get clear next steps and a prevention plan you can follow with confidence—and enjoy a healthier, happier flock soon.


Great roadmap — I actually bookmarked the “Prep first” section. I tried a light cleaning routine and used a soft brush (thinking of the 5-Piece Small Pet Cage Cleaning Brush Set mentioned) to remove debris from perches before calling my vet. Not a fix but helped the birds seem less irritated. Anyone else tried that brush set? 😊
I’ve used the 5-piece brush set — good value. The tiny angled one is perfect for crevices. Pro tip: soak it in hot soapy water then rinse and air-dry to avoid residual detergent.
Ooh I didn’t think to rinse well — thank you! Also, did you notice any difference in mite activity after deep-cleaning?
Thanks for sharing, Sarah — glad the prep tips helped. That brush set is handy for getting into corners without stressing the birds; just be gentle and let the finches calm down between handling.
Short and sweet: the Zymox Avian Topical Spray got a shoutout in the article. Has anyone used it on finches specifically? I’m nervous about something with too strong scents near tiny birds.
Zymox is usually gentle and formulated for avian use, but always do a vet consult first and try a tiny test area. Finches are delicate — less is more.
I sprayed a feather (not the bird) to see how it smelled first. No strong odor and no irritation in my pair, but my vet recommended using it only after confirming mites under a scope.
Long post bc I like context:
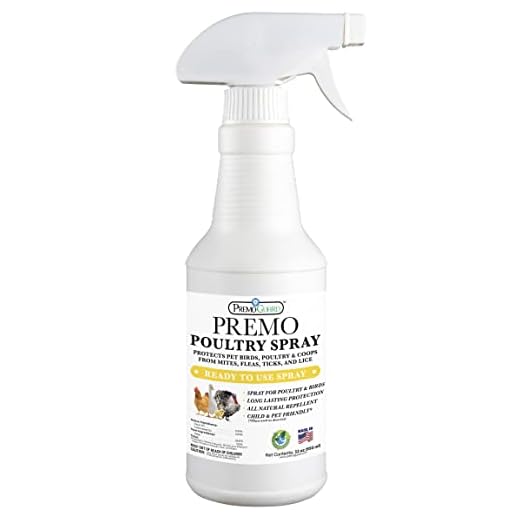
I used the steps in the article to prepare before seeing the vet — cleaned the cage, documented symptoms, and paused any home sprays. Vet prescribed a targeted treatment and also recommended environmental spraying of an approved product. We used Premo Guard 16oz Natural Poultry Spray for the space (vet-approved) and it helped without stressing the birds. Patience is key. Also, if you’re broke like me 😂, ask your vet about low-cost clinics.
Quick question — did your vet recommend treating neighboring aviary areas or just the immediate cage?
Appreciate the budget tip. Vet clinics sometimes sell smaller, vet-approved products too — cheaper than buying large retail cans.
Also, packing a short list of questions for your vet can make appointments more efficient and less costly. Glad your birds are doing better!
Thank you for sharing such a thorough experience, Laura. Great example of balancing home care and professional treatment. And excellent tip about low-cost clinics — many vets have resources or sliding scales.
Super helpful post. Good reminder to pause home sprays and consult vets before treating environment.
Okay real talk — I tried a home remedy someone on FB recommended (apple cider vinegar spray) and it did…nothing. Article’s vet-first approach is smart. Also lol at the Battat Mini Vet Playset being listed — my niece loves it, totally unrelated but cute 😂
Also worth adding: bring any products you used (bottles/labels) to the vet so they can advise on interactions.
Haha Battat set made me smile too. Kids’ toys can be a good way to explain why we can’t use harsh sprays near animals.
ACV cleans surfaces a bit but won’t reach mites on the bird. If you’re doing anything home-based, focus on cleaning and bringing photos/feathers to the vet like the article suggests.
Thanks for the honesty, Emily. ACV gets tossed around a lot online; some people feel it helps cage hygiene but it’s not a mite cure. Love the toy mention — anything that helps kids learn pet care is a win!
Constructive feedback: could use a short troubleshooting flowchart for “if X sign, do Y then Z” — especially for novice owners. The product mentions were helpful though; I clicked on Premo Guard and Zymox links to compare. FYI, premade sprays are tempting but check vet advice!
Seconding the flowchart idea. I felt overwhelmed the first time I saw mites; a simple step-by-step would have helped.
Thanks — a troubleshooting flowchart is a great idea for future updates. And yes, comparing products is smart but please vet-check before application.
Question: article talks about lifecycle of mites — anyone know how long mites can hide in bedding/wood before re-infecting? I’m paranoid and over-cleaned my cage last week haha 😅
Good question. Mite survival off-host varies by species and conditions (temperature/humidity). Many can survive a few days to a couple weeks. That’s why the article recommends combined cleaning + vet treatment and sometimes treating the environment per vet guidance.
Mine survived like 10+ days in old wood, vet said. We replaced some perches, deep-cleaned, and sealed crevices. It felt extreme but worked.
I laughed at the Battat Mini Vet Playset being listed with spray bottles — but on a serious note, involving kids in safe cleaning routines was a nice tip. My daughter uses the toy to “bandage” her stuffed bird and now knows we wipe cages, not spray them in the house 😂
Two cents: vets will often let you try a mild product under supervision. Worth asking.
Cute story. My nephew plays vet too — makes cage cleaning hour slightly less tedious.
That’s a lovely way to teach kids empathy and safety. Thanks for sharing — involving family can make care routines less stressful for everyone.
Exactly — and the article’s cross-link of safe products helps with that conversation.
Haha same here. Also, child-safe demonstration helps them understand why we can’t use certain household cleaners around birds.
Long-ish note because I learned the hard way:
I waited too long and tried to “DIY” the problem with store sprays. Ended up having to go to the vet for stronger treatment. If you follow the article’s “When home fixes aren’t enough” section, you’ll save time and stress. Premo Guard Poultry Pest Control Spray 32oz is on my radar now, but my vet said size and dosage matter — get their go-ahead.
Sorry you had that experience, Tom, but thanks for sharing — exactly why we included the escalation section. Good call to get vet approval for any spray like Premo Guard.
Yes — scheduled a follow-up 10 days after treatment and kept a daily diary of feather/skin changes. The vet also suggested rotating perches and adding more frequent cage spot-checks.
Thanks for being detailed. I was about to buy the 32oz Premo Guard myself — I’ll call my vet first. Did yours recommend any follow-up cleaning routine?
Skeptical but grateful: the article avoided scare tactics and laid out realistic steps. One nitpick — a little more on how to safely store or dispose of contaminated bedding would be helpful. PS: Premo Guard labels are confusing; my vet walked me through reading one. Don’t be shy to ask.
Great point about disposal — we’ll add more on that in an update. And yes, product labels can be confusing; your vet can clarify safe handling and disposal instructions.
For disposal I double-bagged old bedding and left it sealed for a week before trashing. Not perfect, but reduced worries about re-infestation.
Good tip, Robert. I also labeled the trash bag to remind other household members not to open it 😂
Neutral take: article is balanced but could have a short checklist for what to bring to the vet (feather samples, photos, list of products used). It mentions it, but a printable list would be clutch. Also — anyone tried Premo Guard 16oz Natural Poultry Spray? Small bottle might be easier for finch owners.
Checklist idea = yes. I made my own list after reading and it actually helped the vet make a faster diagnosis.
Great suggestion — we’ll consider a printable checklist for a future update. Regarding Premo Guard 16oz, vets sometimes prefer smaller bottles for trial use; always check concentration and vet consent first.
I bought the 16oz version to try on coop birds (not finches) and liked the natural scent. But again, different species = different sensitivity. Ask your vet!
Short: loved the “How to talk to your vet” section. Brought my photos and a feather sample and the vet was impressed — faster solution. Also picked up the 5-piece cleaning brushes afterwards. Worth it.
Fantastic! Bringing evidence like photos and feathers really speeds things up. Glad the brushes helped with maintenance afterward.
Yes — photos helped my vet too. Made the appointment more productive.