Humidity Hacks for Ball Python Eggs — What the Data Really Says
Why Humidity Matters for Ball Python Eggs (And Why the Data Confuses Us)
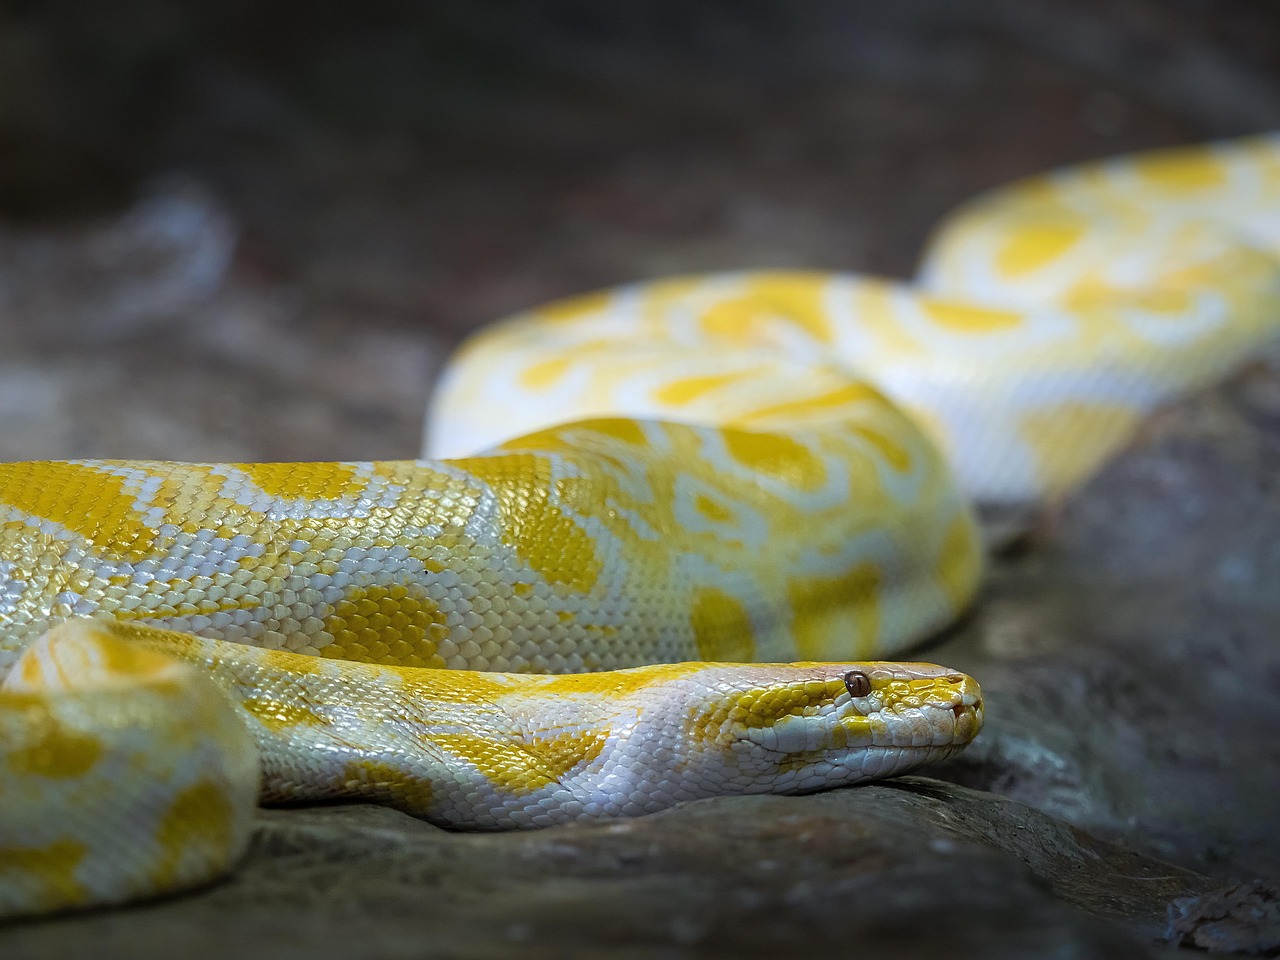
Incubating ball python eggs in a small DIY incubator can be nerve‑wracking. Small humidity shifts alter hatch rates, emergence quality, and timing of pipping and hatching.
This article cuts through anecdote and emotion to focus on WHAT THE DATA actually shows. We’ll summarize egg biology, review research and breeder data on humidity ranges, and translate that into sensible strategies for small incubators.
You’ll get practical DIY humidity hacks that work, clear tips on monitoring and interpreting logged humidity data, and a simple daily-care and contingency checklist to follow through the incubation period.
Read on to replace guesswork with data-backed actions that improve hatch outcomes every time.
Best Value
Amazon.com
ThermoPro TP50 Indoor Temperature and Humidity Monitor
Egg Biology 101: How Humidity Affects Development and Hatch Outcomes
The shell: more than a barrier
An egg shell is a semi‑permeable membrane that lets oxygen in and water vapor out. Developing embryos “breathe” through pores while relying on a steady loss of water to concentrate nutrients and draw the yolk into usable form. Too much or too little moisture changes that balance: the embryo can either dehydrate or be suffocated by fluid-filled tissues. In plain terms, humidity controls gas exchange and how the yolk gets used — both are critical for a healthy hatch.
Too dry vs. too wet: common failure modes
Here are the hatch outcomes you’ll see when humidity strays:
Too low (under‑humid): eggs dry out, membranes stick to the shell (“sticky” eggs), pipping is delayed or fails, and hatchlings can be dehydrated and weak.
Too high (over‑humid): shells stay soft, mold and bacterial growth increase, membranes can separate poorly, and you may see stillbirths or drowned embryos.
Rapid swings: sudden drops or spikes in humidity are often worse than a steady, slightly off target level because embryos can’t adapt quickly.
Why clutch size, egg weight, and genetics matter
Not all eggs respond the same. Larger eggs lose water slower; smaller or lighter eggs dehydrate faster. Genetics play a role too—some morphs and bloodlines historically produce eggs that are more sensitive to moisture loss. Clutch packing (eggs touching) can create micro‑zones of higher humidity inside a clutch, so egg placement matters.
Small incubators = faster change, more attention
DIY and small incubators have tiny air volumes, so every door opening, water cup, or heat source shift changes RH fast. That means two things: aim for narrower safe margins and monitor more frequently. A 5% RH swing in a large cabinet might be nothing; in a 10‑liter DIY box it’s noticeable and biologically important.
Best for Hatching
RYFT 25L Portable Reptile and Egg Incubator
Wide 5°C–60°C temperature range
A compact 25L incubator with precise temperature control and an LED display, perfect for hatching eggs or keeping small reptiles at stable temps. Portable with shelving and dual power options so you can use it at home or on the go.
Use a calibrated digital hygrometer (popular, affordable options include Govee or Inkbird models) inside the incubator.
Weigh eggs weekly to track water loss — a small steady loss is normal; sudden drops are a red flag.
Limit openings and avoid adding large volumes of water at once; small, frequent adjustments are safer than big ones.
Think in ranges and rates: target a stable range and minimize how quickly RH changes.
Next up: we’ll look at the actual hatch‑rate data and translate those principles into evidence‑backed humidity ranges you can use in your incubator.
2
What the Data Really Says: Interpreting Humidity Ranges and Hatch Success
The reported spectrum — and why it’s messy
Across breeder forums and the literature you’ll see one common ballpark: roughly 75–95% relative humidity (RH). That’s a huge span because studies and hobby reports mix very different conditions: incubation temperatures, substrates (vermiculite vs. perlite vs. damp sphagnum), egg porosity, clutch size, and even how RH was measured (ceiling-mounted probe vs. right next to eggs). Those differences explain most of the apparent disagreement.
Consistent trends across batches and studies
When you filter for well‑documented cases, three clear patterns emerge:
Higher RH generally slows egg weight loss and lowers the chance of “shrink-wrapping” (membrane sticking to hatchling).
Very high RH increases mold and bacterial risk, especially if airflow is poor.
Lower RH speeds weight loss and can lead to sticky membranes and failed pips.
Statistically, larger sample sizes (many clutches) smooth out outliers. Single clutch anecdotes are useful but noisy—don’t treat one bad hatch as proof a particular RH “kills” eggs.
Editor's Choice
VIVOSUN AeroLab Wireless Bluetooth Hygrometer Thermometer
App control, VPD, dual-channel accuracy
A smart wireless temp and humidity monitor with Bluetooth app control, VPD visualization, alerts, and dual-channel support via an external probe. It stores long-term data and makes remote monitoring and climate tuning easy for grow rooms, greenhouses, or nurseries.
Measure what matters: weight loss > obsessing over a percent
A more robust metric than a single RH number is egg weight‑loss percentage. Across multiple batches, healthy eggs often lose roughly 8–15% of their initial mass by pre‑pip. That translates to an average daily loss on the order of ~0.15–0.35% per day (varies with incubation length). Track each egg’s weight weekly: steady, gradual decline is good; abrupt drops are a red flag. This approach bypasses sensor placement and calibration problems that make RH readings inconsistent.
Practical, data‑driven target ranges
Based on aggregated breeder data and controlled reports:
Small DIY incubators (fast swings): tighten to about 82–88% with ±3–4% tolerance.
If you’re seeing faster than expected weight loss, raise RH; if you get mold or very soft shells, drop RH or improve airflow. Remember temperature matters: a 1–2°C increase can change water loss rates enough to shift your ideal RH.
Quick statistical sanity-checks
Always log at least one full clutch (8–12 eggs) before changing your method.
Compare mean weight loss and standard deviation across clutches to spot trends.
Treat RH as a control variable, but let weight-loss trajectories drive adjustments.
Next, we’ll move into specific DIY humidity hacks you can use to hit these ranges reliably in small incubators.
3
DIY Humidity Hacks That Work: Practical Techniques for Small Incubators
Substrate: vermiculite by weight (how to measure and tweak)
Weigh dry vermiculite first. Pick a baseline hydration and calculate water weight:
Baseline: 100% hydration = equal weights (1:1 vermiculite:water). Good starting point for most ball python clutches.
If eggs are losing too much weight, increase water to ~110–120%.
If shells are too soft or mold appears, reduce to ~80–90%.
How-to: weigh 1,000 g dry vermiculite → for 100% add 1,000 g water. For 90% add 900 g. Mix until evenly moist but not slushy.
Water sources and stabilizers: pros and cons
Moist paper-towel cups (small deli cup with damp towel): cheap, localized humidity, easy to top up. Downside: can harbor mold if left unchanged.
Shallow water pans: simple and substantial humid source; evaporates quickly in small incubators and needs frequent refills.
Ultrasonic humidifier (small unit like Pure Enrichment MistAire on low): great for steady output; pair with controller to avoid spikes.
Heavy-Duty Control
STC-3028 Dual Display Temperature Humidity Controller
High-power relay for incubators and greenhouses
A versatile digital controller with dual displays and relay outputs designed to manage temperature and humidity for incubators, fermenters, refrigerators, and greenhouses. Reliable AC110–220V operation and wide measurement ranges make it great for heavy-duty climate control tasks.
Use smaller secondary chambers inside the incubator to create micro-climates:
Place the clutch in a deli cup with a moist towel or moistened vermiculite; punch a few small air holes. This protects eggs if the main incubator RH swings.
Divide larger incubators into zones with plastic bins/shelves so you can run one dryer and one wetter area for testing.
Stepwise hacks: calibration, dosing, and small fixes
Calibrate hygrometer quickly: put your hygrometer and a known-good unit or a damp sponge in a sealed small container overnight; note offset and mentally adjust readings. For more accuracy, use a salt test (sat. NaCl ≈ 75% RH) if you want a lab-style check.
Adjust vermiculite by percentage: weigh vermiculite → multiply by target hydration % → add measured water.
Micro-dosing moisture: use a 5–10 mL syringe or eye-dropper to add 1–5 mL to a sponge/deli cup; wait an hour and re-check RH before adding more. Small taps beat big dumps.
Sanitation & redundancy
Clean tubs between clutches with a 10% bleach solution, rinse, dry.
Use fresh substrate per clutch; replace paper towels weekly.
Have redundancy: two hygrometers, two water sources, and a small backup humidity chamber so one failure doesn’t doom the clutch.
Real-world tip: breeders often avoid single-source humidity—if your main cup evaporates overnight, a secondary deli-cup chamber often saves hatch success.
4
Monitoring, Logging, and Troubleshooting: Making Sense of Real-Time Data
Setting up a simple, reliable system
Use at least two digital hygrometers: one at egg level and one mounted near the incubator ceiling. Good picks: SensorPush (accurate, Bluetooth), Inkbird IBS-TH1 (phone logging), or a cheap reliable probe-style unit like the Elitech/Lascar USB dataloggers for long-term records. The twin Antonki units are a handy budget option for redundancy.
Best Value
Antonki 2-Pack Digital Room Thermometer Hygrometers
Twin pack for home and terrarium monitoring
Two easy-to-read digital hygrometers that measure temperature and humidity with separate sensors for better stability and accuracy. Compact, battery-powered, and magnetic or freestanding so you can use one in the bedroom and one in a terrarium or fridge.
Inexpensive dataloggers (Elitech RC-5, Lascar EL-USB-2): store long records you can export for trend analysis.Pick what you’ll actually use. Logging beats eyeballing: a quick chart shows trends you’d otherwise miss.
Reading and interpreting trends
Slow humidity drift: gradual change over days usually means substrate drying or small leaks.
Abrupt swings: hours-long jumps often mean a door opened, pump cycle, or water dump.
Correlate with eggs: if weight loss rate accelerates as RH drifts lower, intervene. Track shell condition (sticky/soft vs. chalky) alongside humidity.
Smoothing noise: use a 6–12 hour moving average (average recent 6–12 readings) to filter hourly spikes and focus on real trends.
Troubleshooting common problems
Humidity drops: add measured moisture (5–10 mL syringe to sponge or vermiculite), tighten seals, or add a second humidity cup. Don’t dump large amounts at once.
Humidity spikes: increase gentle airflow (small fan or open vents slightly), remove saturated substrate, or swap for drier vermiculite.
Mold outbreaks: isolate affected eggs into a clean cup, increase ventilation, and gently clean molds on shells with a 1:10 diluted chlorhexidine or iodine solution only as a last resort. Avoid soaking eggs.
Decision rules — intervene or watch?
Watch: slow, <5% RH drift over several days with normal egg weight trajectory and no visible mold.
Intervene: multi-day drift with accelerating egg weight loss, abrupt >10% RH swings, standing water over eggs, or any persistent mold.Small, measured fixes are usually better than big, reactive changes. Use your logs to guide the next moves and to avoid repeating the same mistake.
5
Daily Care, Contingency Plans, and a Simple Incubator Checklist
Quick daily routine (what to do, in ~5 minutes)
Morning — visual and log check: read both hygrometers, note temp & RH, glance for condensation, mold, or collapsed eggs. Confirm water reservoirs intact and fan/pump running. Afternoon (if you get alerts) — check only if logs show issues. Evening — spot-check egg placement, substrate moisture, and one quick egg weight if you’re tracking trends.
Must-Have
ThermoPro TP49 Mini Indoor Temperature Humidity Gauge
Face-icon comfort indicator and compact design
A compact, accurate indoor thermometer/hygrometer with friendly face icons showing DRY/COMFORT/WET and fast 10-second updates. Small, portable, and easy to mount or set on a table—great for baby rooms, guitars, greenhouses, or general home comfort checks.
Weekly: lift the lid, inspect substrate depth and saturation, refresh water cups or mist a sponge if needed.
Weighing: baseline weigh on day 1, then every 3–5 days early in incubation; after week 6 you can move to weekly if weight loss is steady. Use a kitchen scale accurate to 0.1 g; weigh eggs in the same position each time.
Contingency plans — short, actionable moves
Slow-dropping humidity (over days)
Tighten seals, add a second humidity cup or a damp sponge in a sealed deli cup, and add 5–10 mL water to vermiculite with a syringe (don’t flood).
If weight loss accelerates, increase RH by small increments and re-check daily.
Unexpected heat-up (door left open, failed controller)
Immediately power off extra heaters, open vents, move incubator to cooler room or place ice packs around (not touching unit).
If temp >33°C (91°F) sustained, call an experienced breeder; sustained heat can denature membranes.
Visibly compromised eggs
Sticky (membrane tacky, deforming): usually dehydration — raise RH slowly, don’t try to peel or wash. Boost humidity cups and monitor weight daily.
Moldy: isolate the egg in a clean, slightly drier cup with gentle airflow. Carefully brush mold off and dab with 1:10 chlorhexidine or povidone-iodine — avoid soaking. If mold returns or membrane softens, consult an experienced breeder/vet.
Printable incubator checklist (stick on lid)
Target RH: 75–85% (adjust per clutch notes)
Acceptable swing: ±5% over 12 hours; >10% = intervene
Sensors: one at egg level in cup, one 5–10 cm above eggs
Emergency hydration: 5–10 mL syringe to sponge/vermiculite; don’t pour on eggs
When to call: persistent mold, rapid weight loss (>5% in 3 days), or sticky membrane not improving after 48 hrs
Handling best-practices & red flags
Minimal disturbance: lift only once per check, keep eggs in same orientation.
Hygiene: clean hands, gloves, and dedicated tools.
Gentle recovery: if an egg shifts, realign to its mark and wait 24–48 hrs before further handling.
Red flags needing immediate action: collapsing/deflated eggs, foul smell, running liquid from shell, or temp >33°C sustained. If you see these, pause, document, and call a breeder or vet.
Next, we’ll pull these routines and rules into a practical summary to help you set final targets and expectations for your clutch.
Putting It Together: Practical, Data-Informed Humidity for Happy Hatches
Think ranges, not absolutes: aim for stable microclimates in small incubators rather than perfect single RH numbers. Use weight-loss trends and RH readings together to judge progress, and apply the DIY humidity hacks and simple monitoring habits described earlier. Keep short, consistent logs and iterate across clutches so your adjustments are repeatable and comparable.
Lean on community data but prioritize controlled practices you can reproduce. Experiment carefully, document outcomes, and share what you learn — small, well-recorded improvements from many keepers are how better incubation science grows. Happy hatching and good luck!
Emily Stevens
Emily is a passionate pet care expert and the voice behind Pet Wool Bed.
58 Comments
I tried the ‘sponge in a deli cup’ hack and it worked, until mold set in. 🙃 Any mold-prevention tips in the DIY section would be clutch.
I swap the sponge every 3 days and use a tiny drip instead of a wet sponge. Less surface for mold.
Great feedback — use distilled water, rinse/replace the sponge regularly, and consider adding a small fan for gentle air exchange. I’ll add a mold-prevention subsection.
I gotta say, the troubleshooting flowchart you suggested saved me last month when a fan failed and humidity spiked. The checklist made it fast to isolate the issue.
Thanks for the practical steps — not just theory.
Which fan failed? I’m thinking of adding redundancy after reading this thread.
It was the small circulation fan in my incubator — had a bearing go. I now have a tiny backup fan and it runs on a separate outlet.
Awesome to hear it helped! Practical checklists are the best part of applied care. Glad your clutch made it through.
Humor aside, the section comparing ambient room humidity vs. inside incubator was gold. I used to tweak the whole room thinking that was best. Doh.
Also: anyone tried the Antonki 2-Pack? Thinking of using one inside and one outside to compare.
Yes — compare internal vs external RH regularly. The Antonki 2-Pack is fine for comparative checks; just calibrate them or cross-check with a known-good unit occasionally.
I bought the Antonki pair and they were surprisingly consistent for the price. Good for monitoring trends rather than lab-precision measurements.
The biology part was super helpful. I liked how you explained pore function and gas exchange — made humidity ranges make more sense.
But the charts felt a little dense. Maybe add a tl;dr for new keepers?
TL;DR idea = yes. For me: aim for stable mid-60s–70s RH in incubation and track changes slowly.
Good point, Priya — I’ll add a TL;DR box in the next update. Glad the biology section clicked for you.
Agreed — the biology was my favorite part too. It cleared up why too-high humidity can be as bad as too-low.
Practical tip I wish I saw sooner: label each sensor with the date you started using it. Saved me from false trust when replacing batteries. Also, ThermoPro TP49 fits nicely in small setups.
Labeling saved me too. Also note the last calibration date if you recalibrate occasionally.
Seconding the TP49 — tiny but reliable for backups.
Great tip, Ava — date labels are underrated. Happy to hear the TP49 worked well for your setup.
Loved the DIY hacks section — really practical. I built a humidifier box for my RYFT 25L and used the Antonki hygrometers for cross-checking. Worked like a charm. 👍
Cool — any chance you could share measurements or a pic of your humidifier box? I’m not great at DIY but would try if it’s simple.
Nice! The RYFT 25L is a good small incubator for DIY tweaks. Cross-checking with Antonki units is smart — redundancy helps catch flaky sensors.
This line made me laugh: ‘humidity confuses us more than our partners.’ 😂
Seriously though, if you’re new: buy one decent hygrometer and stop guessing. The STC-3028 controller is lifesaving if you want automatic control.
Can confirm — hooked up an STC-3028 to a misting setup and it kept everything within 2% RH. Worth the learning curve.
Haha, glad that landed. The STC-3028 is a good choice for automation, just be sure to calibrate sensors before trusting them completely.
Small thing — the DIY section recommends distilled water for humidifiers. Can tap water cause issues or is that paranoia? I use tap and haven’t had problems yet.
Tap water can introduce minerals that foster mold or build deposits; distilled lowers that risk. If you’re using tap, just be diligent about cleaning and changing water.
I used tap for years with no issues, but after one mold incident I switched to distilled and never looked back.
Loved the troubleshooting checklist section — printed it and stuck it on my incubator. Also, shoutout to the article for calling out sensor drift. I had a cheap unit that read +8% after a month 😬
Thanks, Zara — sensor drift is sneaky. Rotate or recalibrate sensors every few weeks during the breeding season if possible.
Which cheap unit was it? I have a drawer of random hygrometers and I’m worried now lol.
Great breakdown — finally something that makes the mess of humidity data feel manageable. I switched from eyeballing to using a ThermoPro TP50 and my hatch rates improved.
Quick question: anyone else log hourly vs. daily averages? seems like spikes during the night are more harmful than I thought.
I only did daily averages for a while and missed a humidity dip that killed an egg. Lesson learned: hourly is worth the effort.
Glad it helped, Evan. I recommend logging hourly if you can — patterns like nightly drops show up there. The ThermoPro TP50 paired with a manual log or spreadsheet is a solid combo.
I do hourly with the TP50 and also keep a simple chart. Night spikes were a big surprise to me too — fixed with a small water tray and it smoothed out.
Question from a total newbie: if an egg starts denting a bit, do I raise humidity or lower it? The article mentions both outcomes depending on timing and species and now I’m confused 😅
Photos help a lot. Post one in the thread next time and people can give more specific advice.
I always nudge humidity up a touch if dents appear early. Also check weight if you can — that tells you if it’s dehydrating.
If denting happens mid-incubation, check for dehydration (low RH) first and raise humidity moderately. Late-stage dents can be normal as embryos use up yolk. If in doubt, document and reach out with photos — small adjustments and patience usually help.
Random comment: your section on contingency plans made me feel like less of a freak for having a ‘what if’ box. 😂
I keep an RYFT 25L as a backup incubator; it’s small but saved me once when my main unit iced up.
Glad the contingency section resonated. Backup incubators (like the RYFT 25L) and a simple checklist can really make the difference in a crisis.
Backup saved me too. Also keep a physical printed checklist by the incubator — phone battery dies at the worst times.
Printed checklist is a must. Learned that the hard way during a storm blackout.
Okay real talk: the sensor placement diagram was underrated. I’d add ‘avoid direct contact with condensation’ in bold — I accidentally had a probe touching a water tray and got wild readings. 🤦♀️
Excellent point, Sophie. I’ll make that a bold callout in the next edit. Probe contact with water skews readings badly.
Been there. Wrapped mine in a tiny sock to prevent direct drips while still measuring air temp/humidity.
Lol tiny sock idea is brilliant — saving that one!
Minor nit: the article says keep humidity ‘around 70%’ but doesn’t define tolerance. Is +/- 5% okay? +/-10%? I’m paranoid 😂
Good catch — generally aim for +/- 5% during most of incubation. During the last week or two (if not doing AEE), some breeders shift humidities slightly; still, tighter control is better.
I run +/-4% and saw fewer issues. Paranoia = good in incubation, imo.
I’ll take +/-10% sometimes and survive, but yeah, shoot for tighter if you can.
Not sure about the ‘one-size fits all’ humidity numbers. The article does a decent job saying data varies, but every breeder I talk to swears by their own secret sauce. 🤷♂️
Maybe include case studies next time?
Secret sauce is real haha. But the baseline ranges in the article are still helpful as a starting point.
Agreed — real world case studies would make the data less abstract. Different genetics and incubator types definitely change the ‘right’ humidity.
Fair point. Case studies are on my list for the update — showing varied approaches and outcomes would be useful. Thanks for the suggestion.
Hmm I’ve been using a VIVOSUN AeroLab and sometimes its Bluetooth disconnects. The article mentioned logging — is it ok to use an app-based logger, or are standalone units like the TP49 better?
Yeah Bluetooth is handy but unreliable sometimes. Use both if you can.
Either works. App-based loggers (like VIVOSUN AeroLab) are convenient for remote checks but have connectivity quirks. For critical windows, I recommend a backup standalone gauge (ThermoPro TP49 or Antonki) inside the incubator.
I use VIVOSUN but keep a TP49 tucked in there as a backup. Bluetooth dropped once during a hatch window and the TP49 saved my sanity.